Redux Toolkit Explained: State Management in React with Practical Examples
Redux is a predictable state management library commonly used in React applications to manage and share application state across multiple components.
As React applications grow, managing shared state using props, useState(), or Context API can become difficult, especially when multiple components need to read and update the same data.
Redux provides a centralized approach to state management. Instead of maintaining shared state independently across different components, Redux stores application state in a central location called the Store.
In modern React applications, Redux Toolkit (RTK) is the recommended way to write Redux logic. It simplifies store configuration, state updates, and reducer management while reducing unnecessary boilerplate code.
In this guide, we'll explore Redux fundamentals, understand how Redux Toolkit works, and implement a practical state management example using React and TypeScript.
1. What Is Redux?
Redux is a state management library that provides a centralized store for managing application data.
Instead of passing data through multiple components, components can access the shared state directly from the Redux Store.
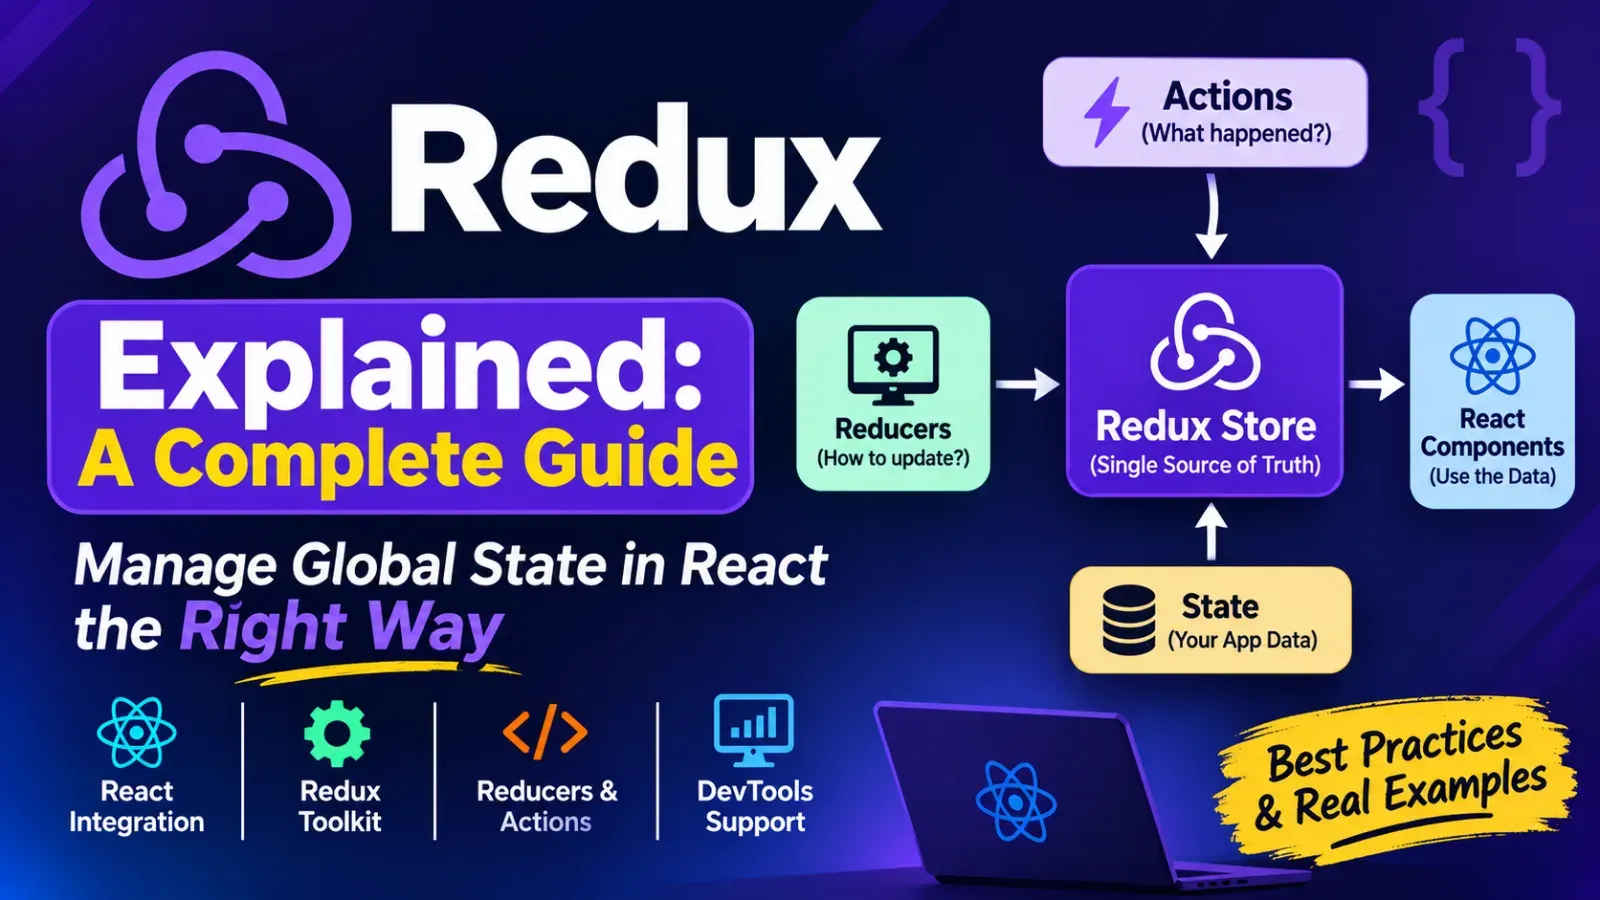
Redux follows a predictable data flow:
- 1.A component dispatches an action.
- 2.The action is processed by a reducer.
- 3.The reducer calculates the updated state.
- 4.The Store saves the new state.
- 5.Components subscribed to the affected state receive updates.
For example, consider an e-commerce application.
Multiple components might need access to shopping cart information:
- ▸Navbar displays the cart item count.
- ▸Product details allow users to add products.
- ▸Cart page displays selected products.
- ▸Checkout page calculates the total amount.
Without centralized state management, sharing and updating cart information across these components can become complicated.
Redux allows all these components to work with the same centralized state.
2. Understanding the Core Concepts of Redux
Before implementing Redux Toolkit, it's important to understand the main concepts behind Redux.
Store
The Store is the centralized location where application state is maintained.
It provides access to the current state and allows updates through dispatched actions.
Actions
Actions describe what happened in the application.
For example:
{
  type: "counter/increment"
}
An action is an object that contains a type property describing the operation.
Reducers
Reducers are functions responsible for calculating the next state based on the current state and an action.
A reducer receives:
- ▸Current state
- ▸Dispatched action
It then determines how the state should change.
Dispatch
Dispatch is the method used to send an action to the Redux Store.
For example:
dispatch({ type: "counter/increment" });Selectors
Selectors are functions or Hook-based selections used to retrieve specific values from the Redux Store.
In React applications, useSelector() allows components to access the required state.
3. What Is Redux Toolkit?
Redux Toolkit is the official recommended approach for writing Redux applications.
Traditional Redux often requires developers to write separate action types, action creators, reducers, and store configuration.
Redux Toolkit simplifies these operations through utilities such as:
| Function | Purpose | |---|---| | configureStore() | Creates and configures the Redux Store | | createSlice() | Creates reducers and generates action creators | | createAsyncThunk() | Handles asynchronous operations | | createSelector() | Creates memoized selectors | | createEntityAdapter() | Provides utilities for managing normalized data |
Redux Toolkit also uses Immer internally, allowing developers to write simpler state update logic while maintaining Redux's immutable state principles.
Instead of manually creating new objects and arrays for every update, developers can write reducer logic that looks like direct state mutation.
We'll see this in the implementation below.
4. Installing Redux Toolkit in React
To use Redux Toolkit with React, we need two packages:
- ▸
@reduxjs/toolkit - ▸
react-redux
Install them using npm:
npm install @reduxjs/toolkit react-reduxIf you're using TypeScript, these packages include the required TypeScript definitions.
We can now configure Redux in our React application.
5. Creating the Redux Store
The Redux Store is the central location where application state is managed.
Redux Toolkit provides configureStore() to create the Store.
Create a file:
src/store/store.tsAdd the following code:
import { configureStore } from "@reduxjs/toolkit";

export const store = configureStore({
  reducer: {},
});
The reducer property defines the reducers responsible for managing application state.
For now, we're passing an empty object because we haven't created any slices yet.
We'll add our reducers in the next step.
6. Understanding createSlice()
One of the most important Redux Toolkit functions is createSlice().
It allows us to define:
- ▸Initial state
- ▸Reducer functions
- ▸Action creators
Let's create a simple counter slice.
Create:
src/features/counter/counterSlice.tsimport { createSlice } from "@reduxjs/toolkit";
interface CounterState {
value: number;
}
const initialState: CounterState = {
value: 0,
};
const counterSlice = createSlice({
name: "counter",
initialState,
reducers: {
increment: (state) => {
state.value += 1;
},
decrement: (state) => {
state.value -= 1;
},
incrementByAmount: (state, action) => {
state.value += action.payload;
},
reset: (state) => {
state.value = 0;
},
},
});
export const {
increment,
decrement,
incrementByAmount,
reset,
} = counterSlice.actions;
export default counterSlice.reducer;Let's understand the important properties.
name
name: "counter"Defines the name of the slice.
Redux Toolkit uses this name when generating action types.
For example:
counter/increment
counter/decrement
initialState
const initialState = {
  value: 0,
};
Defines the initial state managed by this slice.
reducers
reducers: {
  increment: (state) => {
    state.value += 1;
  },
}
Defines the functions responsible for updating the slice state.
Redux Toolkit automatically generates corresponding action creators for these reducers.
actions
export const {
  increment,
  decrement,
  reset,
} = counterSlice.actions;
These are automatically generated action creators.
Instead of manually creating action objects, we can import and dispatch these functions.
reducer
export default counterSlice.reducer;Exports the reducer so it can be registered in the Redux Store.
Important: Although the reducer code appears to modify the state directly, Redux Toolkit uses Immer internally to produce immutable state updates.
7. Registering the Slice in the Redux Store
Now that we've created our counter slice, we need to register its reducer in the Store.
Update:
src/store/store.tsimport { configureStore } from "@reduxjs/toolkit";
import counterReducer from "../features/counter/counterSlice";
export const store = configureStore({
reducer: {
  counter: counterReducer,
},
});Here:
reducer: {
counter: counterReducer,
}Registers the counter reducer under the counter key.
Our Redux state now has the following structure:
{
  counter: {
    value: 0
  }
}
If we create additional slices, we can register their reducers in the same Store.
For example:
export const store = configureStore({
  reducer: {
    counter: counterReducer,
    auth: authReducer,
    cart: cartReducer,
  },
});
Each reducer manages its own section of the application state.
8. Connecting Redux to React with Provider
Creating the Redux Store isn't enough. React components also need access to it.
React Redux provides a Provider component that makes the Store available throughout its descendant component tree.
Open:
src/main.tsxWrap the application with the Redux Provider.
import React from "react";
import ReactDOM from "react-dom/client";
import { Provider } from "react-redux";

import App from "./App";
import { store } from "./store/store";

ReactDOM.createRoot(
  document.getElementById("root")!
).render(
  <React.StrictMode>
    <Provider store={store}>
      <App />
    </Provider>
  </React.StrictMode>
);
Now every component inside App can access the Redux Store using React Redux Hooks.
9. Accessing Redux State with useSelector()
React Redux provides the useSelector() Hook to read data from the Redux Store.
For example, let's create a Counter component.
import { useSelector } from "react-redux";

function Counter() {
  const count = useSelector(
    (state: any) => state.counter.value
  );

  return (
    <div>
      <h2>Count: {count}</h2>
    </div>
  );
}

export default Counter;
Here:
useSelector(
  (state) => state.counter.value
);
Accesses the value property from the counter slice.
Whenever the selected value changes, React Redux can update the component with the latest value.
However, using any isn't recommended in a TypeScript application.
We'll create properly typed Redux Hooks in a later section.
10. Updating Redux State with useDispatch()
While useSelector() reads state, useDispatch() allows components to dispatch actions to the Store.
Let's extend our Counter component.
import { useSelector, useDispatch } from "react-redux";

import {
  increment,
  decrement,
  reset,
} from "./features/counter/counterSlice";

function Counter() {
  const count = useSelector(
    (state: any) => state.counter.value
  );

  const dispatch = useDispatch();

  return (
    <div>
      <h2>Count: {count}</h2>

      <button onClick={() => dispatch(increment())}>
        Increment
      </button>

      <button onClick={() => dispatch(decrement())}>
        Decrement
      </button>

      <button onClick={() => dispatch(reset())}>
        Reset
      </button>
    </div>
  );
}

export default Counter;
Let's understand how it works.
Reading the state
const count = useSelector(
  (state: any) => state.counter.value
);
Reads the current counter value from the Store.
Accessing dispatch
const dispatch = useDispatch();Provides the dispatch function.
Dispatching an action
dispatch(increment());Calls the generated increment action creator and dispatches the resulting action to Redux.
The counter reducer processes the action and updates the state.
The component then receives the updated counter value through useSelector().
11. Passing Data Through Action Payloads
Redux actions can also carry additional data through their payload.
For example, we created this reducer earlier:
incrementByAmount: (state, action) => {
  state.value += action.payload;
}
We can dispatch it with a specific amount:
dispatch(incrementByAmount(5));Redux Toolkit automatically creates an action containing the supplied payload.
For better TypeScript support, we should define the payload type explicitly.
Update the slice:
import { createSlice, PayloadAction } from "@reduxjs/toolkit";

interface CounterState {
  value: number;
}

const initialState: CounterState = {
  value: 0,
};

const counterSlice = createSlice({
  name: "counter",
  initialState,

  reducers: {
    incrementByAmount: (
      state,
      action: PayloadAction<number>
    ) => {
      state.value += action.payload;
    },
  },
});
Now TypeScript knows that incrementByAmount() expects a number.
This helps catch incorrect payload types during development.
12. Creating Typed Redux Hooks with TypeScript
In a TypeScript project, repeatedly defining Store types and using any can make the application harder to maintain.
Redux Toolkit allows us to infer the Store types automatically.
Update:
src/store/store.tsimport { configureStore } from "@reduxjs/toolkit";
import counterReducer from "../features/counter/counterSlice";
export const store = configureStore({
reducer: {
counter: counterReducer,
},
});
export type RootState = ReturnType<
  typeof store.getState
>;
export type AppDispatch = typeof store.dispatch;Here:
RootState
export type RootState = ReturnType<
typeof store.getState
>;Automatically infers the complete Redux state structure.
AppDispatch
export type AppDispatch = typeof store.dispatch;Provides the correct TypeScript type for the dispatch function.
Now create:
src/store/hooks.tsimport {
useDispatch,
useSelector,
} from "react-redux";
import type {
RootState,
AppDispatch,
} from "./store";
export const useAppDispatch =
useDispatch.withTypes<AppDispatch>();
export const useAppSelector =
useSelector.withTypes<RootState>();These typed Hooks eliminate the need to repeatedly specify Store types in components.
Now we can use:
import {
  useAppDispatch,
  useAppSelector,
} from "./store/hooks";

import {
  increment,
  decrement,
} from "./features/counter/counterSlice";

function Counter() {
  const count = useAppSelector(
    (state) => state.counter.value
  );

  const dispatch = useAppDispatch();

  return (
    <div>
      <h2>Count: {count}</h2>

      <button onClick={() => dispatch(increment())}>
        Increment
      </button>

      <button onClick={() => dispatch(decrement())}>
        Decrement
      </button>
    </div>
  );
}

export default Counter;
This provides better type safety and a cleaner developer experience.
13. Handling Asynchronous Operations with createAsyncThunk()
Real-world applications frequently need to communicate with external APIs.
For example:
- ▸Fetching user information
- ▸Loading product listings
- ▸Retrieving orders
- ▸Submitting login requests
- ▸Loading dashboard statistics
Redux Toolkit provides createAsyncThunk() to handle asynchronous operations and automatically generate lifecycle actions.
These actions represent three stages:
| Lifecycle | Meaning | |---|---| | pending | Request has started | | fulfilled | Request completed successfully | | rejected | Request failed |
Let's create a simple example that fetches users from an API.
import {
  createAsyncThunk,
  createSlice,
} from "@reduxjs/toolkit";

interface User {
  id: number;
  name: string;
  email: string;
}

interface UsersState {
  users: User[];
  loading: boolean;
  error: string | null;
}

const initialState: UsersState = {
  users: [],
  loading: false,
  error: null,
};

export const fetchUsers = createAsyncThunk(
  "users/fetchUsers",
  async () => {
    const response = await fetch(
      "https://jsonplaceholder.typicode.com/users"
    );

    if (!response.ok) {
      throw new Error("Failed to fetch users");
    }

    return (await response.json()) as User[];
  }
);

const usersSlice = createSlice({
  name: "users",
  initialState,

  reducers: {},

  extraReducers: (builder) => {
    builder
      .addCase(fetchUsers.pending, (state) => {
        state.loading = true;
        state.error = null;
      })

      .addCase(
        fetchUsers.fulfilled,
        (state, action) => {
          state.loading = false;
          state.users = action.payload;
        }
      )

      .addCase(
        fetchUsers.rejected,
        (state, action) => {
          state.loading = false;
          state.error =
            action.error.message ?? "Something went wrong";
        }
      );
  },
});

export default usersSlice.reducer;
Let's understand the important parts.
createAsyncThunk()
createAsyncThunk(
  "users/fetchUsers",
  async () => {
    // API request
  }
);
Creates an asynchronous Redux action.
pending
.addCase(fetchUsers.pending, (state) => {
  state.loading = true;
});
Runs when the API request starts.
fulfilled
.addCase(fetchUsers.fulfilled, (state, action) => {
  state.loading = false;
  state.users = action.payload;
});
Runs when the request succeeds and stores the returned users.
rejected
.addCase(fetchUsers.rejected, (state, action) => {
  state.loading = false;
  state.error = action.error.message ?? "Request failed";
});
Runs when the request fails.
We can now dispatch fetchUsers() from a component and display the results using useSelector().
14. Organizing Redux in a React Application
For larger applications, organizing Redux code by feature makes the project easier to maintain.
A recommended structure could look like this:
src/
├── app/
│   ├── store.ts
│   └── hooks.ts
│
├── features/
│   ├── auth/
│   │   ├── authSlice.ts
│   │   └── authTypes.ts
│   │
│   ├── counter/
│   │   └── counterSlice.ts
│   │
│   ├── cart/
│   │   └── cartSlice.ts
│   │
│   └── users/
│       └── usersSlice.ts
│
├── components/
│   ├── Navbar.tsx
│   └── Profile.tsx
│
├── App.tsx
└── main.tsx
This structure separates application features and keeps their state management logic together.
For example, authentication-related reducers and actions remain inside the auth feature, while cart-related logic stays inside the cart feature.
As the application grows, additional slices can be created without putting all state management logic into one large file.
15. Redux vs Context API
Both Redux and Context API can help share data across components, but they serve different purposes.
| Feature | Context API | Redux Toolkit | |---|---|---| | Built into React | Yes | No | | Centralized Store | Not inherently | Yes | | Additional dependency | No | Yes | | State updates | Provider value | Dispatched actions | | Reducers | Optional | Core part of Redux | | DevTools | Limited | Redux DevTools | | Middleware | No built-in middleware system | Supported | | Async workflows | Requires additional logic | Supports async thunks and middleware | | Best for | Simple shared application values | More structured application state |
Context API is suitable for sharing relatively simple application values such as themes, authentication information, and language preferences.
Redux Toolkit is useful when an application requires a more structured approach to managing complex shared state, multiple features, and state update workflows.
Neither solution is automatically better for every application. The right choice depends on the application's requirements.
16. Common Redux Toolkit Mistakes
Here are some mistakes developers should avoid when working with Redux.
Mistake 1: Modifying State Outside Reducers
Redux state should be updated through dispatched actions and reducers.
Avoid directly modifying objects returned by the Store.
Mistake 2: Putting Everything in One Slice
A single large slice containing unrelated application features can become difficult to maintain.
Better approach: Organize slices according to application features.
Mistake 3: Using Any in TypeScript
Using any removes many of TypeScript's benefits.
Better approach: Define RootState, AppDispatch, and typed Redux Hooks.
Mistake 4: Storing Unnecessary Data in Redux
Not every state variable needs to be global.
A component's local form input, modal visibility, or temporary UI state can often remain inside React's local state.
Better approach: Keep component-specific state local and use Redux for genuinely shared application state.
Mistake 5: Confusing Redux with API Caching
Redux Toolkit provides asynchronous workflows, but createAsyncThunk() alone does not provide a complete server-state caching and synchronization solution.
For applications with complex API fetching, caching, and invalidation requirements, Redux Toolkit also provides RTK Query.
Conclusion
Redux provides a predictable and centralized approach to managing application state.
With Redux Toolkit, developers can create Stores, define reducers, generate actions, and manage asynchronous operations without writing large amounts of repetitive Redux code.
The most important concepts to understand are:
- 1.Store: Holds the centralized application state.
- 2.Actions: Describe what happened.
- 3.Reducers: Calculate state updates.
- 4.Dispatch: Sends actions to the Store.
- 5.Selectors: Retrieve values from the Store.
- 6.Slices: Organize state and reducer logic by feature.
- 7.Provider: Connects the Redux Store to React components.
The key principle is:
Redux provides a predictable way to manage shared application state by centralizing state ownership and controlling updates through actions and reducers.
Understanding Redux Toolkit will help you build more organized React applications as their state management requirements become more complex.